Silent Is Not Free: The Hidden Bill for Electronic Shutter
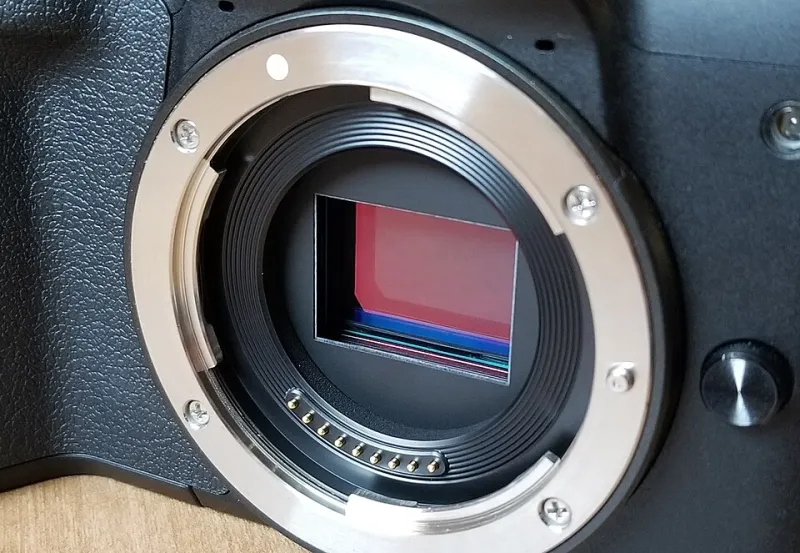
Photo: Nulcheck, CC BY-SA 4.0, via Wikimedia Commons
Electronic shutter arrived as a convenience feature and quietly became a default. Cameras ship with a silent mode that promises no vibration, no wear, and no noise, and a lot of shooters turn it on once and never think about it again. That is the trap. Silent shooting is not a free upgrade — it is a trade, and the costs only surface later, on a card full of frames you cannot use.
None of this is an argument against electronic shutter. It is an argument for knowing which mode you are in and why.
What Actually Changes When the Shutter Goes Quiet
Mechanical shutter fires two curtains, and the exposure ends when the second curtain closes. Electronic shutter reads the sensor line by line instead. That single mechanical difference cascades into everything else: how fast the frame is captured, how the sensor behaves with pulsed light, whether flash can be used at all, and in plenty of bodies, how many bits of color depth get thrown away.
Four costs, in rough order of how often they will bite you.
Cost One: Rolling Shutter, or Why the Goalpost Is Leaning
The sensor does not capture the whole frame at once. It reads rows from top to bottom over a span of time, and anything that moves during that span gets recorded at a slightly different moment depending on where it sits in the frame. That is rolling shutter, and it is the reason a golf swing bends the club, a ceiling fan turns into a set of curved blades, and a sprinting dog looks like it was assembled from spare parts.
How bad it gets depends entirely on readout speed. A fast stacked sensor can read out in a few milliseconds and you will never notice. A slow one takes 25 to 40 milliseconds, and at that point you are shooting an animated slideshow of your subject moving through the frame.
The tell is not just distortion. It is also uneven lighting across the frame when shooting under certain artificial light, and frame-to-frame inconsistency in a burst.
Cost Two: Banding, the LED Tax
Most indoor venues you shoot in are lit with LEDs now, and LEDs are dimmed by flickering rather than by lowering voltage. Your eye smooths it out. Your sensor does not, especially when the sensor takes longer to read than one flicker cycle.
This is why a gym or a conference hall can look clean through the viewfinder and come back striped on the card. The classic fix — matching your shutter speed to the local power grid's flicker rate — helps with older magnetic-ballast lighting, but plenty of modern LED drivers pulse at frequencies that do not care about your shutter speed at all.
Some bodies now offer anti-flicker shooting, which times the exposure against detected flicker. It works, sometimes, and it usually disables other things you wanted. Test it in the room you actually shoot in. Do not assume.
Cost Three: Flash Sync Goes Out the Window
This one ruins shoots rather than shots. On the overwhelming majority of cameras, electronic shutter cannot sync with a strobe at all, or it caps out somewhere around 1/15 to 1/60 of a second. That is a hard ceiling, and it means you cannot freeze motion with flash, you cannot darken ambient light with a fast shutter, and you cannot do the standard outdoor portrait move of underexposing the sky and lighting your subject separately.
If your day involves strobes, electronic shutter is a mode you use by exception, not by default. High-speed sync in particular is a mechanical-shutter trick.
Cost Four: The Bit-Depth Haircut
Manufacturers are not always loud about this. Many bodies drop from 14-bit to 12-bit output when the electronic shutter is active, because a slower readout is what makes the extra precision possible. Two bits sounds like nothing until you are pushing shadows three stops on a backlit portrait and watching tonal gradation turn to mud.
Landscapes and studio work where you plan to edit hard? Check the bit depth for the specific drive mode you are in. The answer is usually buried in the manual, which is where the spec sheet hides its best secrets.
Map Your Own Camera in About Twenty Minutes
You do not need lab equipment. You need a fan, an LED bulb, a flash, and a little patience.
The fan test. Point the camera at any ceiling fan or spinning bike wheel and shoot a burst in electronic mode. Then repeat in mechanical. Compare. The difference in curvature tells you how fast your readout really is, regardless of what the marketing claims.
The flicker test. Find a dimmable LED bulb, set it to a low brightness, and shoot at 1/500, 1/1000, and 1/2000 in both shutter modes. Stripes appearing in one mode and not the other is your answer.
The flash test. Mount a speedlight and try to fire at 1/250 in electronic mode. Most bodies will refuse or silently fall back. Note which yours does.
The shadow test. Shoot an underexposed frame in each mode, push it three stops in your editor, and look at the color in the darkest tones. That is your bit depth telling on itself.
Write the results down somewhere you will find them. A note on your phone is fine.
Where Electronic Shutter Is Genuinely Safe
Static subjects under continuous light, tripod work, landscapes, architecture, museum and ceremony shooting where noise is forbidden, and any situation where you want mechanical stillness to protect sharpness on a long lens. That is a big chunk of most people's photography, and in those cases silent mode is a pure win.
The rule is simple enough to memorize. If the scene moves, if the light flickers, if a strobe is involved, or if the shadows will need serious lifting — go mechanical until you have proven your body can handle it.